Inside This Guide
The 2026 Reality Check: Why Privacy is Non-Negotiable
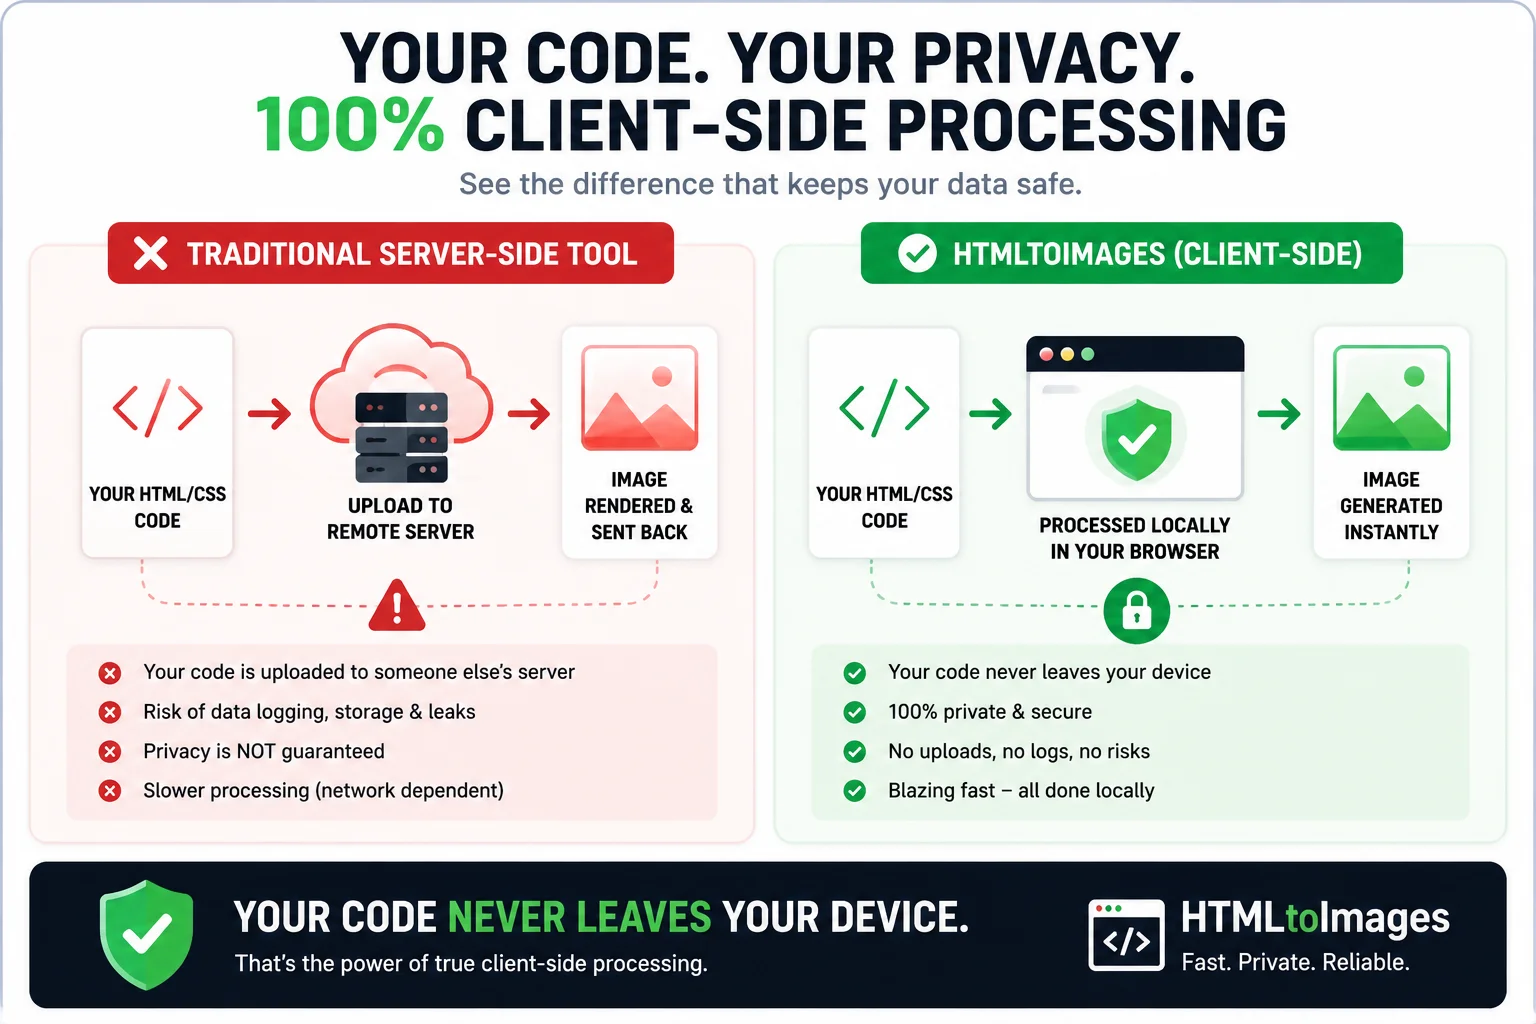
Let's address the elephant in the room first. Data Security.
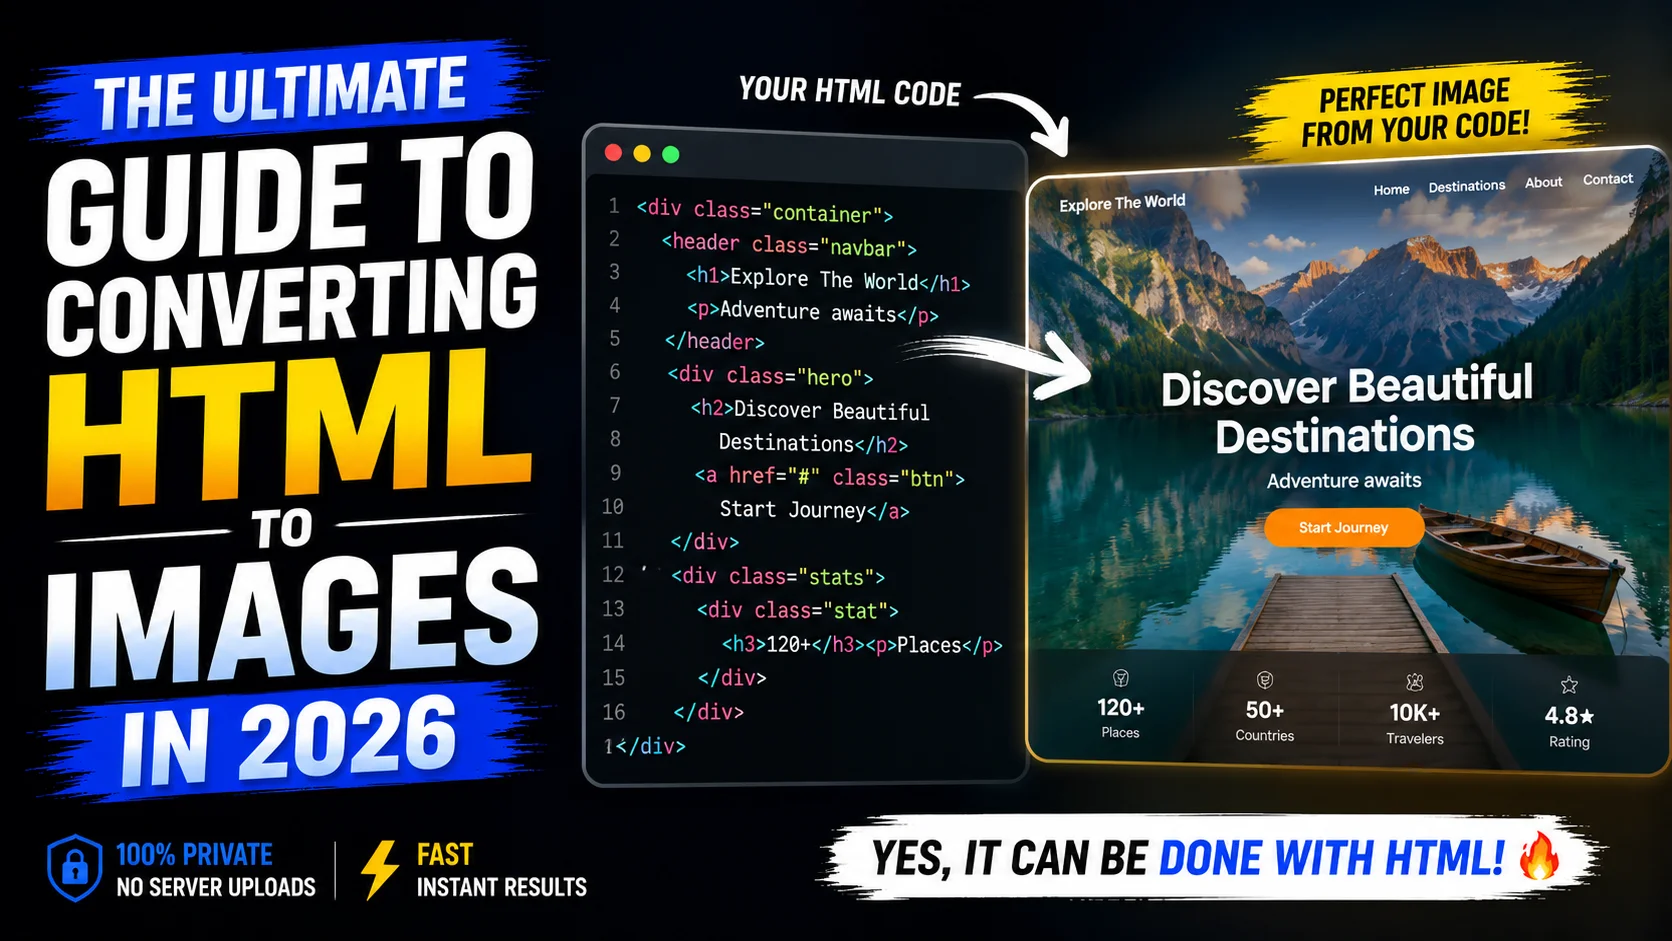
Historically, if you wanted to convert HTML to an image, you used a tool that worked like this: You give them your raw code, they upload it to a random server in the cloud, a headless browser takes a screenshot, and they send you the image file back.
In 2026? That approach is completely unacceptable. Imagine pasting proprietary UI designs, internal company dashboards, or sensitive API documentation into a tool that logs and stores every line of your code. You simply cannot risk it.
The HTMLtoImages USP (Our X-Factor)
This is exactly why I built tools like our HTML to PNG and Tailwind to Image converters. They run 100% locally in your browser. Your code never, ever leaves your computer. We process everything client-side, giving you total privacy and instant zero-latency results.
Wait, what if I need a PDF instead?
If you are looking to bundle multiple images into a secure document, we've got you covered. Check out our 100% client-side Image to PDF and JPG to PDF converters. Just like our image tools, your files never leave your computer.
Method 1: Client-Side Browser Tools (The Safe Way)
If you just want to get the job done fast without writing custom backend scripts, modern web applications are the way to go. But make sure they process everything client-side.
When you paste your HTML and CSS into a modern client-side converter, the tool hijacks your browser's native rendering engine. It literally paints your code onto a hidden HTML5 canvas using DOM reading magic. Because it uses your own browser to render the output, what you see is exactly what you get.
The Pros
- Zero server uploads (total privacy)
- Instant real-time previews
- No installation required
The Cons
- Hard to automate at a massive scale
- Relies entirely on your local device memory
Method 2: JavaScript Libraries (html2canvas)
If you're a dev building an application and need a "Download as Image" button for your users, you need a JavaScript library. And the undisputed king of this space is html2canvas.
This library acts like a detective. It parses all the DOM elements on your page, reads their computed CSS styles, and manually rebuilds the entire visual structure on a canvas element.
import html2canvas from 'html2canvas';

// Grab the div you want to screenshot
const targetElement = document.getElementById('my-dashboard-widget');

html2canvas(targetElement, {
  scale: 2, // Pro tip: Use 2x for Retina-quality sharpness
  backgroundColor: null, // Keep those transparent backgrounds
  useCORS: true // You'll need this if loading external images
}).then(canvas => {
  // Boom! Export as a base64 PNG
  const imageData = canvas.toDataURL('image/png');

  // Trigger the download automatically
  const link = document.createElement('a');
  link.download = 'high-res-capture.png';
  link.href = imageData;
  link.click();
});
The Catch: html2canvas is essentially "guessing" the layout based on CSS properties. It's brilliant, but it can occasionally trip up on super complex CSS grid layouts or crazy SVG clipping paths.
Method 3: Headless Browsers (Puppeteer)
Alright, what if you are running an enterprise pipeline where 100% pixel-perfect accuracy is non-negotiable? You can't rely on guessing. You need the heavy artillery: Puppeteer (Chromium) or Playwright.
Instead of faking a render, these tools launch a literal, invisible web browser on your server and take a programmatic screenshot. Every font, flexbox container, and animation is captured exactly as Google Chrome would see it.
const puppeteer = require('puppeteer');

async function renderHtmlToImage(htmlString) {
  // Fire up the invisible browser
  const browser = await puppeteer.launch();
  const page = await browser.newPage();

  // Inject your HTML string
  await page.setContent(htmlString, { waitUntil: 'networkidle0' });

  // Set your exact dimensions
  await page.setViewport({ width: 1200, height: 630, deviceScaleFactor: 2 });

  // Snap the picture
  const element = await page.#capture-target;
  await element.screenshot({ path: 'output-image.png' });

  await browser.close();
}
The Catch here? It's heavy. You need a dedicated backend server running Node.js. And if you're offering this to users, you are officially violating the privacy principle because their code is now on your server.
The Big Debate: PNG vs JPG vs WebP
You've rendered the HTML. Now, what format do you export it as? Pick the wrong one, and your crisp code snippets will look like a blurry mess.
PNG Format
Lossless compression. Razor-sharp text. Supports transparency. The undisputed champion for HTML conversions.
WebP Format
PNG-level quality but significantly smaller file sizes. Perfect if you're uploading the image to a website.
JPG Format
Lossy compression built for photos. Creates nasty artifacts and blurry halos around your code text.
Frequently Asked Questions
Where can I safely convert my files?
You can safely convert your HTML and CSS files directly at HTMLtoImages.com. Our tools are built specifically for security and privacy, running 100% locally in your browser.
What is the best format for HTML screenshots: PNG, JPG, or WebP?
For UI components and code snippets that contain text, PNG is the best format due to its lossless compression which keeps text razor-sharp. If you need a smaller file size for web performance, WebP is the modern standard. You should generally avoid JPG for text-heavy HTML, as it introduces visible compression artifacts.
Where can I convert my documents securely without uploading them?
You can convert your documents securely without any uploads at HTMLtoImages. We use advanced client-side processing, which means your code is never sent to a remote server. Everything happens instantly on your own computer, guaranteeing zero data leaks.
Can I convert HTML to an image using JavaScript?
Yes, you can use client-side libraries like html2canvas or dom-to-image. These tools read the DOM structure and CSS properties of your elements, and then programmatically redraw them onto an HTML5 Canvas element. The canvas can then be easily exported as a base64 image data URL.
Why is my HTML screenshot blurry?
Blurry screenshots usually happen because the rendering engine isn't accounting for high-DPI (Retina) displays. Always ensure you set your capture scale or deviceScaleFactor to 2x or higher when using libraries like html2canvas or Puppeteer.
How do I take a full-page screenshot of a website?
For a quick capture, you can use Chrome Developer Tools (Command Menu > Capture full size screenshot). For automation, use a headless browser like Puppeteer and set the fullPage: true option in the screenshot method.
Does html2canvas support all CSS properties?
No. While html2canvas is incredibly powerful, it struggles with complex CSS grid layouts, advanced box-shadow spreads, and some CSS filters. For 100% pixel-perfect renders of complex CSS, a headless browser like Puppeteer is required.
Can I convert Tailwind CSS to an image?
Yes! We actually have a dedicated Tailwind to Image converter that compiles your utility classes on the fly and renders them into beautiful, shareable images instantly in your browser.
Is it possible to automate HTML to Image conversions?
Absolutely. For massive scale automation, you should set up a Node.js server running Puppeteer or Playwright, which can programmatically visit URLs or render raw HTML strings into images.
Why are external images not showing up in my HTML capture?
This is almost always a CORS (Cross-Origin Resource Sharing) issue. To fix this, you must enable the useCORS flag in your capture library and ensure the external image host allows cross-origin requests.